
To replace an AirTag battery, start by powering down the device and carefully removing its back cover. Access the battery compartment, remove the old battery, and ensure the replacement battery is correctly oriented before installation. Place the new battery in the exact position as the original, avoiding any damage that could lead to short-circuiting. Once installed, reattach the back cover, making sure it is firmly in place without any gaps or air pockets. Confirm the battery replacement by activating and pairing the AirTag with your iPhone through the Find My network. Verify its functionality by checking the battery level, signal strength, and connectivity within the app. Post-replacement, handle the device with care to preserve its water and dust resistance, ensuring long-term performance and reliability of your AirTag. Remember to dispose of the old battery responsibly according to local regulations.
Replacing an AirTag battery is a straightforward task that ensures your device remains accurate and reliable in tracking your valued possessions. This beginner-friendly guide demystifies the process, from recognizing the need for a battery swap to meticulously sealing your AirTag post-replacement. Whether you’re familiar with Apple products or new to their ecosystem, this article provides clear instructions on how to replace an AirTag battery effectively. Follow along as we cover everything from understanding your AirTag’s design to maintaining its longevity through proper battery maintenance. Learn the signs indicating it’s time for a replacement and get ready to handle your device with care using the necessary tools and safety measures. With our step-by-step guidance, you’ll confidently replace an AirTag battery and restore its peak performance.
- Understanding Your AirTag: An Overview of Apple's Item Tracker
- The Importance of Battery Maintenance in AirTags
- Identifying When It's Time to Replace Your AirTag Battery
- Preparing for the Replacement: Tools and Safety Precautions
- Step-by-Step Guide to Safely Open Your AirTag
- Removing and Replacing the AirTag Battery Correctly
- Sealing Your AirTag After Battery Replacement: A Step-by-Step Process
- Post-Replacement Checklist: Ensuring Your AirTag Functions Optimally
Understanding Your AirTag: An Overview of Apple's Item Tracker

When the time comes to ensure your AirTag remains accurate and functional, replacing its battery is a straightforward process that can be performed by anyone with basic tool knowledge. The AirTag, Apple’s innovative item tracker, is designed with a user-replaceable battery, enabling you to extend its life span without the need for professional assistance. To start, it’s crucial to understand the design of your AirTag; it has a CR2032 coin cell battery that powers its Bluetooth and UWB (Ultra-Wideband) technology capabilities. Apple provides detailed instructions and tools for this task, including a special screwdriver tip, in the AirTag packaging. Before proceeding, make sure to power down your AirTag, remove the back casing carefully, and disengage the battery connector. After safely removing the old battery, align the new one with the proper polarity as indicated inside the AirTag, connect it to the circuit board, replace the back casing, and you’re done. This simple maintenance task can save you from the frustration of a dead device and ensure that your AirTag continues to accurately track your valuables. Remember, replacing an AirTag battery is not only a skill that enhances the functionality of your device but also a way to stay connected with your belongings seamlessly. With this guide, you’re equipped to confidently and efficiently replace your AirTag battery whenever necessary.
The Importance of Battery Maintenance in AirTags
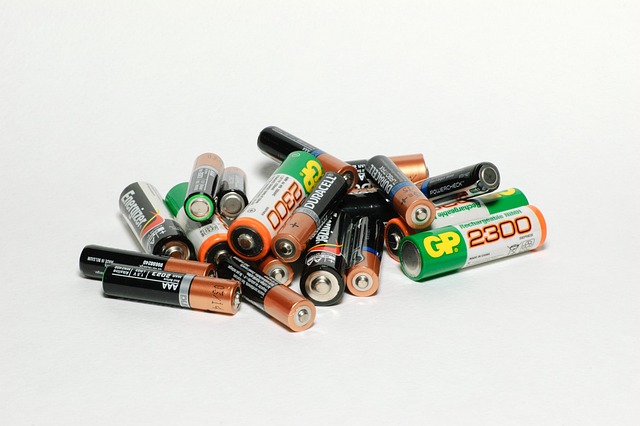
Regular maintenance of your AirTag’s battery is paramount for ensuring its functionality and longevity. As with any electronic device, the battery in an AirTag degrades over time when not in use or exposed to extreme temperatures. To maximize the lifespan of your AirTag, it’s advisable to replace its battery approximately once a year, depending on usage frequency and environmental conditions. The process of replacing an AirTag battery is straightforward and can be done by users with basic technical skills. By following Apple’s official guidelines and utilizing the necessary tools, such as a tri-point screwdriver, you can efficiently remove the back cover, replace the battery, and restore the functionality of your item tracker. It’s recommended to perform this task periodically to avoid unexpected loss of connectivity due to battery exhaustion. For those who are not comfortable with performing this replacement themselves, Apple and authorized service providers offer battery services for a fee. However, learning how to replace an AirTag battery allows users to save time and money while maintaining a reliable tracking system for their valued belongings. Regularly refreshing the battery in your AirTag is not just about preserving its functionality but also about ensuring that you continue to receive precise location updates when you need them most.
Identifying When It's Time to Replace Your AirTag Battery

When your AirTag’s battery begins to wane, it’s crucial to recognize the signs to ensure continued functionality and optimal performance. Typically, Apple’s Find My network will inform you when your AirTag’s battery needs attention; however, being proactive can save you from unexpected losses in connectivity or functionality. The original CR2032 coin cell battery designed for the AirTag is not user-replaceable due to its waterproof design, but knowing when to replace it is key. Most users experience consistent usage for about a year, with some experiencing slightly longer or shorter durations based on their usage patterns. It’s advisable to monitor the battery level indicator in the Find My app regularly and note any significant changes. When the indicator shows a low charge percentage or you notice that your AirTag is not updating its location as frequently as usual, it’s likely time to replace the battery. This straightforward process can be performed by authorized Apple service providers or, if you’re comfortable with minor electronics repairs, you can follow Apple’s official guidelines to replace an AirTag battery. Remember to handle the AirTag gently and power it down before beginning the replacement to avoid any accidental activation that could disrupt the process. By staying vigilant and responding promptly when your AirTag signals a low battery, you can maintain its reliability and enhance your experience of keeping track of your valuable items with precision and confidence.
Preparing for the Replacement: Tools and Safety Precautions

When embarking on the task of replacing an AirTag battery, preparation is key to ensuring a smooth process and avoiding any potential complications. To begin, gather the necessary tools, which include a small Phillips screwdriver and a pry tool or spudger. These items will assist in carefully disassembling the AirTag without causing damage. It’s crucial to work in a clean, well-lit environment to avoid accidental scratches or slippage of components. Before you start, power down your AirTag by long-pressing the button on the back until the LED light flashes red, indicating that it’s off. This step prevents any electrical interference during disassembly.
Safety should be your top priority throughout the replacement process. Ensure you’re wearing anti-static wrist strap to prevent electrostatic discharge that could harm your device or affect its functionality. Additionally, handle all parts gently, as they can be fragile. Follow the instructions provided in the AirTag’s user manual for detailed steps on removing the casing and accessing the battery compartment. Once you’ve successfully replaced the battery, reassemble your AirTag carefully, making sure all components are secured and aligned properly. Finally, activate the AirTag by bringing it close to your iOS device, ensuring that the replacement battery is functioning correctly. Remember, replacing a AirTag battery can be done with patience and attention to detail, and with the proper preparation and safety measures in place, you’ll have your tracking device up and running in no time.
Step-by-Step Guide to Safely Open Your AirTag
When the time comes to extend the life of your AirTag with a new battery, it’s essential to approach the task carefully to avoid damage to the device or injury to yourself. To replace an AirTag battery, you’ll need a pentalobe screwdriver and a spudger, both of which are precision tools designed for electronics repair. Start by powering off your AirTag; this is a safety precaution to prevent any electrical hazards during disassembly.
Locate the rear panel of your AirTag—this is the side where you can see the battery icon. Using the pentalobe screwdriver, remove the four pentalobe screws securing the rear panel to the AirTag. Once the screws are out, gently use the spudger to detach the rear panel from the casing by inserting it between the panel and the casing and applying a steady amount of force until the panel can be lifted away. With the rear panel removed, you’ll have access to the battery, which should be loosened next using the spudger to pry it out. Be mindful as you handle the battery—it may hold a charge even after powering off, so exercise caution to prevent electrical shocks or fires. After safely removing the old battery, align the new one with the corresponding slots and gently press it into place, ensuring it is securely connected before reattaching the rear panel. Reverse the process of removing the screws and panels to complete the replacement. Remember to dispose of the old battery responsibly according to your local waste regulations. By following these steps, you can confidently replace an AirTag battery and keep your device functioning optimally.
Removing and Replacing the AirTag Battery Correctly

When the time comes to replace an AirTag battery, precision and care are key to ensure the device functions optimally after the procedure. Begin by powering down your AirTag using the AirTag app on your iOS device. Once the AirTag is powered off, locate a small flat-head screwdriver to assist in the removal process. The battery is accessible once you remove the metal cover at the back of the AirTag by gently prying it away with the screwdriver. Be mindful not to use excessive force to avoid damaging the device.
Upon removing the back cover, you will gain access to the battery compartment. Carefully lift the battery out, taking note of its orientation and position within the casing. Before replacing the new battery, ensure it is compatible with the AirTag model; otherwise, the device may not function as intended. Reinstallation is the reverse process: align the new battery in the same position as the old one, then press it gently into place until you hear a click indicating that the battery is securely seated. Finally, replace the metal cover, ensuring it snaps firmly back into position. After completing these steps, your AirTag should be ready for continued use with fresh power. Remember to recycle the old battery responsibly according to local regulations.
Sealing Your AirTag After Battery Replacement: A Step-by-Step Process
When replacing an AirTag battery, ensuring the device is properly sealed is crucial for maintaining its water and dust resistance. A well-sealed AirTag guarantees that it functions optimally and withstands environmental factors. To achieve a secure seal after battery replacement, follow these precise steps:
Begin by gently removing the back of your AirTag using a pry tool or a similar small flathead screwdriver. Be careful not to apply excessive force as this can damage the device. Once the back cover is off, carefully remove the old battery, noting its position and orientation for proper alignment during reinstallation. Procure a replacement battery that is compatible with the AirTag model you possess.
Place the new battery in the same position as the old one, ensuring it sits flat without any bends or creases. This correct placement prevents potential short-circuiting and ensures the battery’s longevity and efficiency. Next, align the back cover over the battery and AirTag body, pressing down firmly around all edges to create a tight seal. Use a soft cloth or your fingertips to avoid scratching the delicate surfaces. Once the back cover is securely in place, give it a gentle twist to confirm it’s tightly fastened. To verify the seal, you can run a slim tool along the edges to check for any gaps or air pockets. If present, carefully remove the back cover and reseal it, ensuring no moisture or debris can enter. Properly sealed, your AirTag should now be ready for continued use after replacing the battery. Remember to handle the replaced device with care during this transition period to avoid accidental damage or opening, which could compromise its new battery.
Post-Replacement Checklist: Ensuring Your AirTag Functions Optimally

When you’ve successfully replaced the battery in your AirTag, it’s crucial to perform a series of checks to ensure that your device is functioning optimally. Begin by pairing your newly-batteried AirTag with your iPhone. This step establishes a connection between your AirTag and the Find My network, allowing for precise location tracking. Once paired, activate the AirTag by holding it close to your smartphone until you see a confirmation message on your device’s screen. Next, verify that the battery level indicator on your iPhone reflects the fresh battery’s charge; it should show a full charge if you’ve replaced the battery correctly. Ensure that the AirTag is within range of your iPhone and that the signal strength in the Find My app is optimal. Move around slightly to test the connectivity, as this will help the AirTag to establish a stable connection with your phone. If you encounter any issues during these steps, consider consulting Apple’s support resources or visiting an authorized service provider for further assistance. By diligently following this post-replacement checklist, you can confidently enjoy the full benefits of your AirTag with its newly replaced battery. Remember to remove any metallic objects or debris that may have been near the battery contacts during replacement to prevent interference with the connection. With these checks complete and all connections confirmed, your AirTag should be ready to provide accurate location tracking and notifications for the duration of the new battery’s life.
When it comes to maintaining your AirTag’s performance, replacing the battery is a straightforward yet crucial task. This guide has walked you through understanding your AirTag, emphasizing the importance of battery health, and providing clear signs to watch for that indicate it’s time to replace your AirTag battery. With the proper tools at hand and following our detailed steps for safe opening and battery removal, you can confidently perform this maintenance yourself. After sealing your AirTag and running through the post-replacement checklist, your device should be functioning at its best once again. Remember, regular battery replacements are key to ensuring your AirTag’s longevity and reliability in keeping track of your valuables. Replacing an AirTag battery doesn’t have to be a daunting task; with the right guidance, it’s a manageable process that empowers you to keep your device in optimal condition.