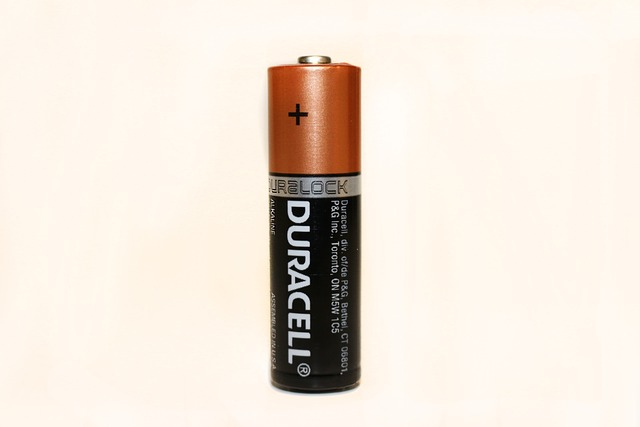
To maintain the functionality of an Apple Airtag, regularly monitoring and timely replacing its battery are essential due to its critical role in powering location data recording and signal transmission. A degrading battery can lead to less frequent updates and even failure to respond to commands, thus compromising tracking capabilities. Users should be vigilant for signs of reduced activity or responsiveness, which may indicate the need for a new battery. Early detection allows for a seamless replacement, ensuring sustained optimal performance and precision in location data accuracy. The process of replacing an Airtag battery involves carefully handling the device to avoid damage, using the correct tools like a pry tool, spudger, and fine tweezers, and following Apple's detailed instructions to ensure safety and effectiveness. This includes safely disposing of the old battery in line with environmental regulations. By adhering to these guidelines, users can confidently and successfully replace an Airtag battery, restoring its reliability and functionality for everyday use. Remember, replacing an airtag battery requires precision and attention to detail to preserve the device's integrity and accuracy.
When your device’s tracker battery fades, locating and replacing it is key to maintaining its functionality. This article demystifies the process of diagnosing a dead tracker battery and offers a detailed guide on how to effectively replace an Airtag battery, ensuring your device remains reliable and up-to-date. We’ll explore the importance of a tracker battery in device performance, recognize signs of battery depletion, and provide step-by-step instructions for a safe and efficient replacement. With practical tips for prolonging your tracker’s battery life and insights into warranty and service options post-replacement, you’ll be equipped to handle this task with confidence. Replacing an Airtag battery has never been easier or more straightforward.
- Understanding the Role of a Tracker Battery in Device Functionality
- Identifying Symptoms of a Dead Tracker Battery
- Preparing to Replace Your Tracker's Battery Safely and Effectively
- Step-by-Step Guide to Replacing an Airtag Battery
- – Gathering Necessary Tools and Materials
- – Removing the Back Cover with Precision
Understanding the Role of a Tracker Battery in Device Functionality

When a device like an Airtag relies on a tracker battery for functionality, it’s imperative to recognize the critical role this power source plays in its operation. The battery within a tracker is the lifeline that powers all functionalities, from recording location data to transmitting signals. Without a fully charged battery, these devices cannot perform their intended purpose of tracking and locating. As such, understanding how the battery influences device performance is crucial for users who depend on precise location information. The battery’s health directly affects the accuracy and reliability of the tracker’s services, making it essential to monitor its status regularly. For instance, when considering how to replace an Airtag battery, users must first identify the signs that indicate a depleting charge, such as reduced frequency of updates or a device that fails to respond to commands. Recognizing these cues promptly allows for a timely battery replacement, ensuring the tracker maintains optimal functionality. Users can extend their devices’ lifespan and enhance their tracking experience by replacing an Airtag battery when necessary with care and precision. This not only preserves the integrity of the device but also ensures that users receive the most accurate and up-to-date location data, which is particularly vital in scenarios where precision is paramount. Regular maintenance and timely battery replacements are key to keeping trackers functional and reliable.
Identifying Symptoms of a Dead Tracker Battery

When a tracking device’s battery reaches its expiration, it can significantly impact the performance and functionality of the device. Identifying symptoms of a dead tracker battery is crucial for timely replacement and maintenance. One of the most evident signs is a decline in signal strength; if your device was previously reliable but now experiences frequent disconnections or struggles to hold a connection, it may be time to replace an Airtag battery. Another symptom is erratic behavior such as inaccurate tracking data, which can lead to misplaced confidence in the device’s location accuracy. Additionally, if your tracker has a low power indicator that remains lit, despite recent charging, or if it fails to hold a charge at all, these are clear indications that the battery needs to be replaced. Regularly checking for these symptoms and performing a replacement using the appropriate tools and techniques can ensure your tracker continues to function effectively. For those looking to replace an Airtag battery specifically, Apple provides guidance on how to safely and efficiently conduct the battery replacement process, ensuring minimal disruption in keeping track of your valued items.
Preparing to Replace Your Tracker's Battery Safely and Effectively

When the time comes to replace your Tracker’s battery, such as an Apple Airtag, it’s crucial to approach the task with both precision and caution. Begin by ensuring you have the appropriate tools at hand; typically, a small pry tool or a similar device designed for opening electronic devices will be necessary. Carefully remove the back cover of your Tracker, taking note of any clips or screws that need to be set aside—make sure to keep them organized to avoid losing any parts during the process. Once the casing is opened, locate the battery—it’s usually held in place with adhesive. Gently detach it without applying excessive force that could damage the device.
With the battery exposed, proceed with caution. Safety is paramount; handle the battery cells with care as they can pose a risk of fire or chemical burns if damaged or mishandled. Follow the manufacturer’s instructions for battery removal and installation. If you’re replacing an Apple Airtag battery, refer to Apple’s official guidance or consult a professional service provider to avoid voiding your warranty or causing unintended damage. After removing the old battery, clean the contact points on the device to ensure optimal electrical connection with the new battery. When installing the replacement battery, align it correctly and apply adhesive if necessary, ensuring that the battery is snugly in place without obstructing any sensors or components. Once the new battery is securely fastened, reassemble your Tracker, making sure all parts are properly aligned and the device is closed tightly. After completing the replacement, perform a functionality check to ensure your Tracker is operational and the battery is charging as expected. Remember to recycle the old battery according to local regulations to minimize environmental impact.
Step-by-Step Guide to Replacing an Airtag Battery

To ensure your Apple Airtag functions optimally, it’s crucial to maintain its battery health. If you notice that your Airtag is not tracking as accurately as before, or if it fails to hold a charge, it might be time to replace the battery. Here’s a step-by-step guide to perform this task with precision and care:
Begin by powering off your Airtag and removing any accessories attached to it. Use a pentalobulated screwdriver to carefully unscrew the back cover of the Airtag. Be mindful not to apply excessive force, as this could damage the device. Once the back cover is removed, gently detach the battery connector from the main circuit board, taking note of its orientation for reassembly.
Proceed by removing the old battery with the same precision used during installation. Ensure you handle the new battery with clean, dry hands to avoid contamination. Install the new battery by aligning the positive and negative sides correctly, then carefully reconnect the battery connector to the main circuit board. Reattach the back cover, ensuring it is securely fastened by screwing it back into place with the pentalobulated screwdriver. Finally, power on your Airtag to confirm that the replacement battery is functioning and that the device is properly tracking items as intended. Remember to recycle the old battery according to local regulations. By following these steps, you can effectively replace an Airtag battery and maintain the reliability of your tracking experience.
– Gathering Necessary Tools and Materials

When planning to replace an Airtag battery that has ceased to function, it’s crucial to have the right tools and materials on hand to ensure a successful replacement. Begin by gathering the necessary items, which typically include a small Phillips screwdriver, a prying tool or spudger, a pair of fine tweezers, and an anti-static mat or wristband to prevent electrical damage to the device during disassembly. Additionally, you will need a new battery that is compatible with your Airtag model. It’s essential to choose a high-quality replacement battery to maintain the reliability and functionality of the Airtag. Once you have all the components, proceed by carefully removing the Airtag from its enclosure, being mindful not to damage any internal components or the water resistance seal. Follow the instructions provided by Apple for your specific model of Airtag to avoid any complications during the replacement process. By preparing and using the correct tools and materials, you can successfully replace an Airtag battery and restore its functionality with ease.
– Removing the Back Cover with Precision

When faced with a dead Tracker battery, one of the initial steps in the replacement process is removing the device’s back cover with precision. This task requires careful attention to detail to avoid any damage to the Tracker or its components. To begin, locate the release mechanism that holds the back cover in place. This could be a set of small tabs or clips designed to snap into place for a secure fit. Use a plastic tool, such as a spudger or a similar thin, rigid object, to gently insert and pry along the edges of the back cover. Apply a consistent amount of pressure to release the tabs without forcing them apart. If your Tracker has screws securing the back cover, ensure you keep track of these screws as they are typically very small and can be easily misplaced. Once all clips or screws are disengaged, lift the back cover away from the device with a steady hand. Be mindful to set the back cover aside in a safe location where it won’t get lost or damaged during the battery replacement process. Carefully removing the back cover is a critical step that sets the stage for safely accessing and replacing the battery of your Tracker, especially if you aim to replace an Apple Airtag battery, which follows similar steps for disassembly.
In concluding our exploration of the topic, it’s clear that diagnosing and replacing a dead tracker battery, such as an Airtag, is a task that empowers users to maintain the functionality and reliability of their devices. By understanding the critical role these batteries play and recognizing the signs of depletion, individuals can proactively address the issue before it affects performance. Our step-by-step guide has equipped readers with the knowledge and steps necessary to safely and effectively replace their Airtag battery. With the right tools and a methodical approach, users can ensure their trackers continue to serve as dependable companions in tracking and locating important items. For those seeking to extend the life of their devices, learning how to replace an Airtag battery is an invaluable skill that enhances device longevity and user experience.