
To extend the lifespan of your Apple Airtag, you can replace its battery by following a detailed guide that emphasizes safety and precision. Begin by gathering essential tools like a small Phillips screwdriver, precision tweezers, and a spudger or pry tool. Ensure you have a new battery that matches the original in voltage, capacity, and dimensions, and use an anti-static wrist strap to prevent static discharge. Back up any data from your Airtag before starting. The process involves powering down the Airtag, removing the back cover, disconnecting the old battery, installing the new one with correct polarity, reconnecting it, and then reassembling the device with the rear casing securely in place, using the pentalobe screw to finish. Always handle batteries with clean, dry hands to avoid contamination. After completing the replacement, verify the Airtag's functionality by checking its location in the Find My app and ensuring it is properly connected and listed under your devices. If you encounter any connectivity issues or discrepancies in battery life post-replacement, consult Apple's support documentation, remove and re-add the Airtag in the Find My app, wait 24 hours for a new battery to charge, and check for any obstructions or metallic objects that might interfere with its performance. By following these steps, you can successfully replace an Airtag battery and maintain its optimal functionality.
When your Apple Airtag’s performance begins to wane, replacing its battery is a straightforward task that can breathe new life into your tracking device. This article demystifies the process of “replace an Airtag battery” by guiding you through each step with precision and care. From grasping the essentials of your Airtag to safely removing the old battery and installing a fresh one, we provide a comprehensive overview, including a checklist for post-replacement verification and troubleshooting tips for common issues. Whether you’re tech-savvy or new to DIY repairs, this guide will empower you to handle the task confidently, ensuring your Airtag remains reliable and functional.
- Understanding Your Airtag: An Overview of Apple's Tracker
- Preparing for Battery Replacement: Necessary Tools and Precautions
- Step-by-Step Guide to Safely Remove the Old Battery
- Identifying the Correct Replacement Battery for Your Airtag Model
- Installation of the New Battery: Step-by-Step Instructions with Tips
- Post-Replacement Checklist: Ensuring Your Airtag Functions Correctly
- Troubleshooting Common Issues After Replacing Your Airtag Battery
Understanding Your Airtag: An Overview of Apple's Tracker

When the time comes to prolong the life of your Apple Airtag, safely replacing its battery is paramount. The Airtag serves as a powerful tool within the ecosystem of Apple products, allowing users to keep track of their valuable items with precision. To navigate this process effectively, it’s crucial to understand the design and functionality of the Airtag. This compact tracking device relies on a small battery that, over time, will inevitably lose its charging capacity. Replacing an Airtag battery requires a level of precision and attention to detail to avoid any potential damage to the device or injury to oneself. It’s essential to follow Apple’s guidelines and utilize the necessary tools for this task. The process begins with removing the Airtag’s back casing, which can be accomplished with a combination of tools such as a small flathead screwdriver and tweezers. Once the casing is carefully opened, you will gain access to the battery, which can then be detached using the provided removal tool or a similar suitable instrument. It’s imperative to discharge the Airtag before handling the battery to ensure safety. After safely removing the old battery, align the new one with care and reassemble the Airtag, ensuring that all components are securely in place. Upon completion, your Airtag will be restored to full functionality, equipped with a fresh battery ready for its next cycle of locating and safeguarding your treasured items. Remember, replacing an Airtag battery can be done by anyone with basic hand tools and patience, but it’s always recommended to refer to official Apple documentation or seek professional assistance if you’re not confident in performing the task independently.
Preparing for Battery Replacement: Necessary Tools and Precautions

When planning to replace an Airtag battery, preparation is key to ensuring the process is completed safely and efficiently. Begin by gathering the necessary tools for the task. You will require a small Phillips screwdriver to remove the back cover of the device; precision tweezers to handle the delicate tracking disc carefully; a pry tool or a spudger to gently separate the components without causing damage; and a new battery that is compatible with your Airtag model. Ensure the replacement battery matches the original in terms of voltage, capacity, and size to avoid any issues post-replacement.
Before proceeding with the actual battery removal, take precautions to prevent static damage to the circuitry. Use an anti-static wrist strap to ground yourself and work on a clean, flat surface to prevent losing any small parts. It’s also advisable to back up your Airtag or any data it may hold before beginning the process. This step ensures that you do not lose any important information if there are unexpected complications during the battery replacement. With these tools and precautions in place, you’re well-prepared to safely replace your Airtag battery. Proceed with care, following the manufacturer’s instructions, to avoid any potential pitfalls and ensure the longevity of your device.
Step-by-Step Guide to Safely Remove the Old Battery
To safely replace your AirTag battery, it’s crucial to follow a detailed, step-by-step guide. Begin by powering off your AirTag; this will prevent any electrical interference during disassembly. Locate the pentalobe screw at the edge of the AirTag and remove it using a Pentalobe screwdriver. Carefully peel back the rear casing from the top edge of the AirTag, working around all sides to detach it from the adhesive. Once the casing is removed, gently lift the battery from its position, taking note of the polarity indicator to avoid mixing up the positive and negative terminals. Use a spudger or a similar tool to carefully disconnect the battery connector before setting the old battery aside.
With the old battery removed, prepare your new battery by ensuring it’s fully charged. Align the new battery in the same orientation as the old one, making sure the polarity matches. Reconnect the battery connector, and then proceed to reattach the rear casing, pressing it firmly into place until the adhesive secures it. Finally, replace the pentalobe screw to complete the installation. Remember to handle the new battery with clean, dry hands to avoid any contamination that could affect performance or safety. After these steps, your AirTag should be fully functional with a fresh battery, ready for continued use.
Identifying the Correct Replacement Battery for Your Airtag Model
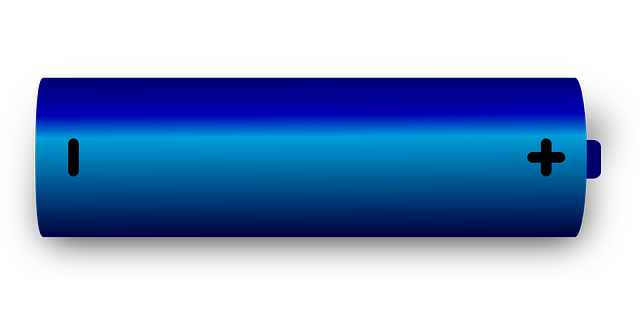
When the time comes to replace your AirTag battery, it’s crucial to identify the correct replacement battery for your specific model. This ensures optimal performance and compatibility with your device. To begin, consult the AirTag user manual or Apple’s official support resources to determine the exact model of your AirTag. Each AirTag model has a unique battery compartment design, necessitating a compatible battery replacement. The CR2032 lithium coin battery is the standard power source for most AirTag models, but it’s essential to verify this before making a purchase. Be cautious not to confuse battery types or sizes, as using an incorrect battery can lead to improper functionality or damage your AirTag. Once you’ve confirmed the correct battery model, you can proceed with the replacement process. It’s advisable to replace your AirTag battery every year or two, depending on usage, to maintain its reliable location tracking features. Remember to follow Apple’s official guidance or visit an authorized service provider for assistance in selecting and installing the right battery to ensure the safety and functionality of your AirTag device.
Installation of the New Battery: Step-by-Step Instructions with Tips
When it comes time to replace your Airtag battery, ensuring safety and precision is paramount. Begin by powering off your device completely; this step prevents any electrical interference during the battery replacement process. Next, remove the back cover of the tracker carefully to access the battery compartment. Take note of how the cover is detached as this will need to be reversed upon reassembly. Once inside, use a spudger or a similar tool to gently pry up the battery tab, releasing the old battery without causing any damage to the device.
With the old battery removed, align the new battery in place, ensuring it seats correctly within the designated slots. Press down firmly but gently to ensure the battery is securely in position. Reattach the battery tab to maintain a solid connection and prevent accidental detachment during use. After reassembling the tracker, power it back on and verify that it’s functioning properly with the new battery installed. It’s recommended to test the Airtag’s functionality by placing it near your iPhone or checking its location in the Find My app to confirm that it’s accurately tracking its position. Remember to handle the new battery with clean, dry hands to avoid any electrical conductivity issues during installation. Proceed with caution, and if at any point you feel uncomfortable, consider seeking assistance from a professional.
Post-Replacement Checklist: Ensuring Your Airtag Functions Correctly
When you’ve successfully replaced your Airtag battery, it’s crucial to verify that the device is functioning correctly. To ensure optimal performance and accuracy of location services, follow this post-replacement checklist. Firstly, activate your Airtag by holding it close to your iOS device until the message “Airtag Found” or “Airtag Connected” appears on your screen. This step initiates the pairing process and allows your Airtag to connect with your Apple account and devices. Next, confirm that the Airtag is recognized in the Find My app by navigating to the Devices tab, selecting your Airtag, and checking its status at the top of the screen. Once confirmed, conduct a real-time test by moving the Airtag to a different location. Observe if the movement is detected and the new location is updated in the Find My network within a few minutes. If this process is successful, your Airtag battery replacement is likely complete, and you can rest assured that it will function correctly. Remember to note any differences in battery life or functionality moving forward to address any potential issues promptly. By adhering to these steps, replacing an Airtag battery becomes a straightforward task with clear post-replacement verification procedures.
Troubleshooting Common Issues After Replacing Your Airtag Battery

If you’ve recently replaced your Airtag battery and are encountering issues, there are several common problems that can be troubleshooted to restore its functionality. One frequent issue is the Airtag not connecting to your device or other Airtags. This can often be resolved by ensuring that both your Airtag and the device it’s paired with are close to each other and Bluetooth is turned on. If the Airtag still isn’t connecting after checking these basics, try removing it from your device in the Find My app and then re-adding it.
Another common issue arises when the battery level of the Airtag appears incorrect or the Airtag is unresponsive. This could be due to the new battery not being fully charged yet or an error in the battery reading. Allow the Airtag to charge for at least 24 hours before checking the battery level again. If the problem persists, it’s possible that the battery was not installed correctly. In such cases, refer to Apple’s official guide on replacing the Airtag battery or consider taking it to a professional for assistance. Additionally, ensure that the Airtag is not covered by metal or other materials that might interfere with its signal, as this can affect its performance and accuracy in locating your device. By addressing these common issues systematically, you can often resolve problems related to replacing an Airtag battery and enjoy the full benefits of this helpful tracking device once more.
Replacing an Airtag battery can be a straightforward task with the right preparation and attention to detail. By understanding your device, gathering the necessary tools, and adhering to safety precautions outlined in “Understanding Your Airtag,” you’re well-equipped to undertake this process. The step-by-step guide provided ensures that you can safely remove the old battery and correctly install a new one, with tips tailored for your specific Airtag model. With the help of the post-replacement checklist, you can verify that your Airtag is functioning as intended. Should you encounter issues after the replacement, the troubleshooting section offers solutions to common problems. By following these guidelines, replacing an Airtag battery becomes a manageable task, allowing you to maintain its reliability and effectiveness. For comprehensive guidance on how to replace your Airtag battery safely, be sure to consult the article in full.