If your Apple AirTag's battery life is fading, you have two main options for addressing this issue. For those with some technical expertise, replacing the AirTag battery yourself at home is possible with the right tools and a genuine replacement battery that matches the original in terms of voltage and capacity. It's crucial to follow precise instructions, ensuring you power down the device first, carefully remove the back casing without applying too much force, disconnect the battery connector for safety, and then correctly install the new battery with proper alignment before reassembling the device. For a worry-free replacement or if you're not comfortable performing the task yourself, it's advisable to seek assistance from authorized service providers who can ensure expert handling, use of genuine parts, and warranty support with their professional services. Whether you choose to DIY or opt for professional help, maintaining your AirTag's battery health is essential for consistent performance and connectivity within the Find My network. Always remember to update the firmware after the replacement and reset any necessary data to ensure optimal functionality of your AirTag.
When the signal begins to wane on your AirTag, it’s time to consider replacing its battery. This guide demystifies the process of doing so with precision and care. We’ll explore the design of your AirTag, locate its battery compartment, and delve into the essential tools required for a successful replacement. Whether you prefer a DIY approach or opting for professional assistance, this article provides a comprehensive overview to ensure your AirTag remains a reliable companion in keeping track of your valuables. Learn how to replace an AirTag battery effectively, maintain its functionality, and extend its lifespan with our detailed instructions and tips.
- Understanding Your AirTag: An Overview of Its Design and Battery Compartment
- The Importance of Timely AirTag Battery Replacement for Optimal Performance
- Step-by-Step Guide to Safely Replace Your AirTag Battery
- Essential Tools Required for an AirTag Battery Replacement
- How to Disassemble Your AirTag Without Risking Damage
- Identifying the Best Replacement Batteries for Your AirTag
- Tips for Ensuring a Successful AirTag Battery Replacement at Home
- Professional Services for AirTag Battery Replacement: When to Seek Help
Understanding Your AirTag: An Overview of Its Design and Battery Compartment

When considering a replacement for your AirTag battery, it’s crucial to have an intimate understanding of the device’s design and the location of its battery compartment. The Apple AirTag is engineered with user-friendliness in mind, featuring a compact and durable enclosure that protects both its electronic components and the battery. To safely replace the battery without risking damage to the AirTag, one must access the battery compartment, which can be found by carefully removing the back cover. This process involves prying off the tamper-resistant fasteners that secure the casing. Once these are detached, you’ll gain access to the battery and can proceed with the replacement. It’s advisable to use a small plastic tool, like a spudger, to ensure the back cover is released without causing any harm to the AirTag’s internal structures. After the back cover is removed, the battery will be exposed, allowing for the old battery to be carefully disconnected and the new one to be connected in its place. This replacement task can typically be done by the user, but if you’re not comfortable with this level of technical work or if your AirTag is still under warranty, it may be best to consult Apple Support or visit an authorized service provider to perform the battery swap. Remember to recycle your old battery according to local regulations and properly configure your AirTag after the replacement to ensure optimal performance and connectivity with your Apple ecosystem.
The Importance of Timely AirTag Battery Replacement for Optimal Performance

Regular maintenance of your Apple AirTag is crucial for its optimal performance, and one of the most vital aspects of this maintenance is timely AirTag battery replacement. Over time, the battery within your AirTag will deplete, which can lead to reduced functionality and connectivity issues. When the battery’s charge falls below a certain threshold, the AirTag’s efficiency diminishes, potentially causing it to lose connection with other Apple devices or fail to hold a charge long enough for continuous use. Therefore, recognizing when to replace an AirTag battery is essential for users who rely on these devices for tracking items, enhancing the Find My network, or ensuring personal item security.
To ensure your AirTag operates at its best, it’s recommended to follow the manufacturer’s guidelines on battery life and replacement. Typically, Apple suggests replacing the AirTag battery once every year or two, depending on usage patterns. The process of replace airtag battery is designed to be user-friendly; however, if you’re not comfortable performing this task yourself, seeking assistance from an authorized service provider is advisable. Utilizing genuine replacement batteries, as recommended by Apple, guarantees the longevity and reliability of your AirTag. With a fresh battery in place, your AirTag will resume its role as a dependable companion for keeping track of your valuable possessions.
Step-by-Step Guide to Safely Replace Your AirTag Battery

When the time comes to extend the life of your AirTag by replacing its battery, it’s crucial to approach the task with care and precision. The AirTag is designed with a user-accessible battery compartment, allowing for straightforward battery replacement without the need for specialized tools or expertise. To ensure a safe and efficient process, begin by powering off your AirTag and removing it from its enclosure if it’s attached to a keychain or placed within a protective case. Locate the pentalobe screw on the rear of the AirTag; you’ll need a P5 Pentalobe screwdriver to remove it. After accessing the battery, use a spudger or a similar tool to gently pry up the battery tab, being mindful not to puncture or tear the battery. Once the tab is lifted, proceed to carefully detach the battery from its connector, taking note of its proper alignment for reattachment later. With the old battery removed, install the new CR2032 battery, ensuring it’s properly seated and connected before securing it back in place with the pentalobe screw you initially removed. Follow the reverse order of steps to close the AirTag, ensuring a snug fit, and power it on to confirm that the replacement was successful. Remember to handle the new battery with clean, dry hands and avoid contact with metallic objects or moisture to maintain its functionality. By adhering to these guidelines, you can confidently replace your AirTag battery and maintain its performance without complications.
Essential Tools Required for an AirTag Battery Replacement

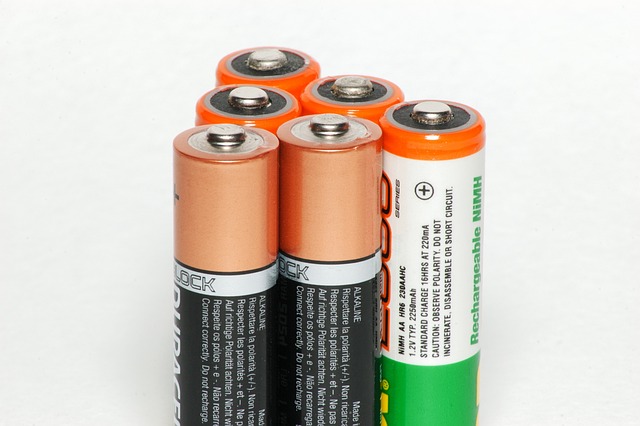
When aiming to replace an AirTag battery, the task requires precision and care due to the device’s delicate components and compact design. To successfully execute this process, several specialized tools are indispensable. Firstly, a set of fine-tipped precision screwdrivers is essential for navigating the intricate screws securing the AirTag’s back cover. These screws are tiny and may vary in size, necessitating both Phillips and pentalobe screwdrivers to avoid stripping or damaging them during removal. Additionally, a suction handle or adhesive tool can be invaluable for safely removing the battery without causing any damage to the AirTag’s casing. This tool helps maintain a secure grip, allowing for gentle yet firm suction that can lift the battery from its housing.
Upon gaining access to the battery compartment, anti-static materials and a static-free work environment become critical to prevent electrical damage to the AirTag. A replacement battery that is compatible with the AirTag model is also required; it should be properly charged before installation to ensure optimal performance post-replacement. Furthermore, a small plastic tool or spudger may be necessary to gently maneuver components without exerting excessive force and causing potential harm to internal circuits. A magnifying glass can also aid in inspecting the battery connections for corrosion or wear, ensuring that the replacement is not only a direct fit but also that the device operates at its best after the procedure. With these tools at hand, users can confidently approach the task of replacing an AirTag battery with the assurance of a successful outcome.
How to Disassemble Your AirTag Without Risking Damage
When considering replacing your AirTag battery, careful disassembly is paramount to avoid unintended damage to your device. The Apple AirTag’s design is sleek and seemingly impenetrable, but with patience and the right tools, you can replace the battery without professional assistance. Begin by powering off your AirTag; this is a safety precaution to prevent any electrical surges while you work on it. Use a pry tool to gently separate the rear casing from the body of the AirTag. Apply even pressure around the perimeter to avoid cracking the casing or snapping any components. Once the back is off, remove the old battery with a spudger or a similar flat instrument, ensuring you do not detach any cables improperly. It’s crucial to handle the new battery with clean, dry hands and to follow the alignment guides when placing it into the AirTag. Misalignment can lead to poor contact and battery malfunction. After securing the new battery in place, carefully reassemble the device, making sure all parts are snugly fitted without over-tightening, which could potentially damage the internal circuits.
To navigate the disassembly process successfully, consult Apple’s official documentation or reputable tutorials that provide step-by-step guidance. Additionally, ensure you have the correct replacement battery compatible with your AirTag model, as variations exist for different generations. Remember to work in a clean, well-lit area to avoid introducing dust or lint into the device, which can cause short circuits and affect performance. With these precautions in mind, replacing your AirTag’s battery can be a straightforward task that extends the life of your valuable tracking companion.
Identifying the Best Replacement Batteries for Your AirTag

When the time comes to replace your AirTag’s battery, it’s crucial to select a replacement that offers both longevity and reliability. The original battery used in AirTags is designed to last for an extended period, but like all rechargeable batteries, it will eventually deplete its charge capacity. Identifying the best replacement batteries involves considering factors such as compatibility, quality, and brand reputation. For those looking to replace an AirTag battery on their own, it’s essential to find a battery that matches the exact specifications of the original. This ensures that the device functions optimally and maintains its connection with other Apple devices via the Find My network.
To ensure successful replacement, opt for reputable brands known for their high-quality lithium batteries. These brands often provide detailed instructions and guarantee their products to be compatible with your AirTag. Additionally, they may offer warranties or customer support to assist with any issues that arise during the installation process. It’s advisable to purchase replacement AirTag batteries from trusted sources to avoid counterfeit products that could potentially damage your device. By adhering to these guidelines and choosing the right replacement battery, you can extend the life of your AirTag and maintain its performance at its best.
Tips for Ensuring a Successful AirTag Battery Replacement at Home
When considering the task of replacing an AirTag battery at home, it’s crucial to approach the process with precision and care. The first step is to gather all necessary tools and materials before beginning the replacement. This includes a small Phillips screwdriver, a pry tool or spudger, a clean, flat surface for your work area, and a replacement battery that is compatible with the AirTag model you own. Ensure that the replacement battery matches the original in terms of voltage and capacity to avoid any compatibility issues.
Once you have the tools and battery on hand, proceed by powering down your AirTag. Remove the back casing carefully by gently prying around its edges without applying excessive force that could damage the device. With the casing off, disconnect the battery connector from the AirTag’s logic board to prevent any electrical contact or potential short circuits during the replacement process. After removing the old battery, install the new one, ensuring it is properly seated and securely connected to the logic board. Reassemble the AirTag, reattach the back casing, and connect the AirTag to its charging case to complete the replacement. It’s advisable to perform a firmware update after replacing the battery to ensure proper functionality and to reset any data that may have been affected during the process. Following these steps carefully will help you successfully replace your AirTag’s battery at home, ensuring continued use of this essential tracking device.
Professional Services for AirTag Battery Replacement: When to Seek Help

When the battery life of your AirTag starts to wane, it’s crucial to address this issue promptly to maintain its functionality and reliability. Replacing an AirTag battery is a task that can be performed by users with some technical expertise; however, for those who are not comfortable with such repairs or if you prefer a professional touch to ensure optimal performance, seeking help from authorized service providers is the best course of action. Professional services offer expert handling and a precise replacement process, ensuring your AirTag functions at its peak. These services are particularly beneficial if you’re dealing with hardware issues that might complicate a battery swap beyond the scope of typical user repairs. By choosing a professional, you can rest assured that the job is done correctly, utilizing genuine parts to maintain the integrity of your device and its features. Additionally, professional repair centers often provide warranty support and service guarantees, adding an extra layer of security for your investment.
Before opting for a professional replacement, assess whether the battery drain is significant or if it’s merely intermittent. If you’re experiencing frequent use with consistent performance but the battery is draining faster than usual, a replacement might resolve the issue. On the other hand, if your AirTag is not turning on or holding a charge at all, it’s likely that a full replacement or repair is needed. In such cases, professional services are indispensable, as they can diagnose and fix both software and hardware problems efficiently and effectively. Remember to check with Apple or authorized service providers for the latest guidelines and support options related to AirTag battery replacements to ensure your device remains under warranty and receives the best care possible.
When it comes to maintaining the functionality of your AirTag, replacing its battery is key. This article has equipped you with comprehensive knowledge on how to successfully undertake this task at home, from understanding the design of your AirTag to mastering the tool-specific steps for battery replacement. With the right tools in hand and following the guide provided, you can ensure a seamless battery swap that will keep your AirTag precision-accurate in location tracking. For those who prefer professional assistance or encounter difficulties, recognizing when to seek expert service is crucial. By heeding the advice and tips outlined here for replacing an AirTag battery, you’ll prolong its lifespan and enhance its performance. Remember, with the right approach, maintaining your AirTag can be as straightforward as changing its power source.